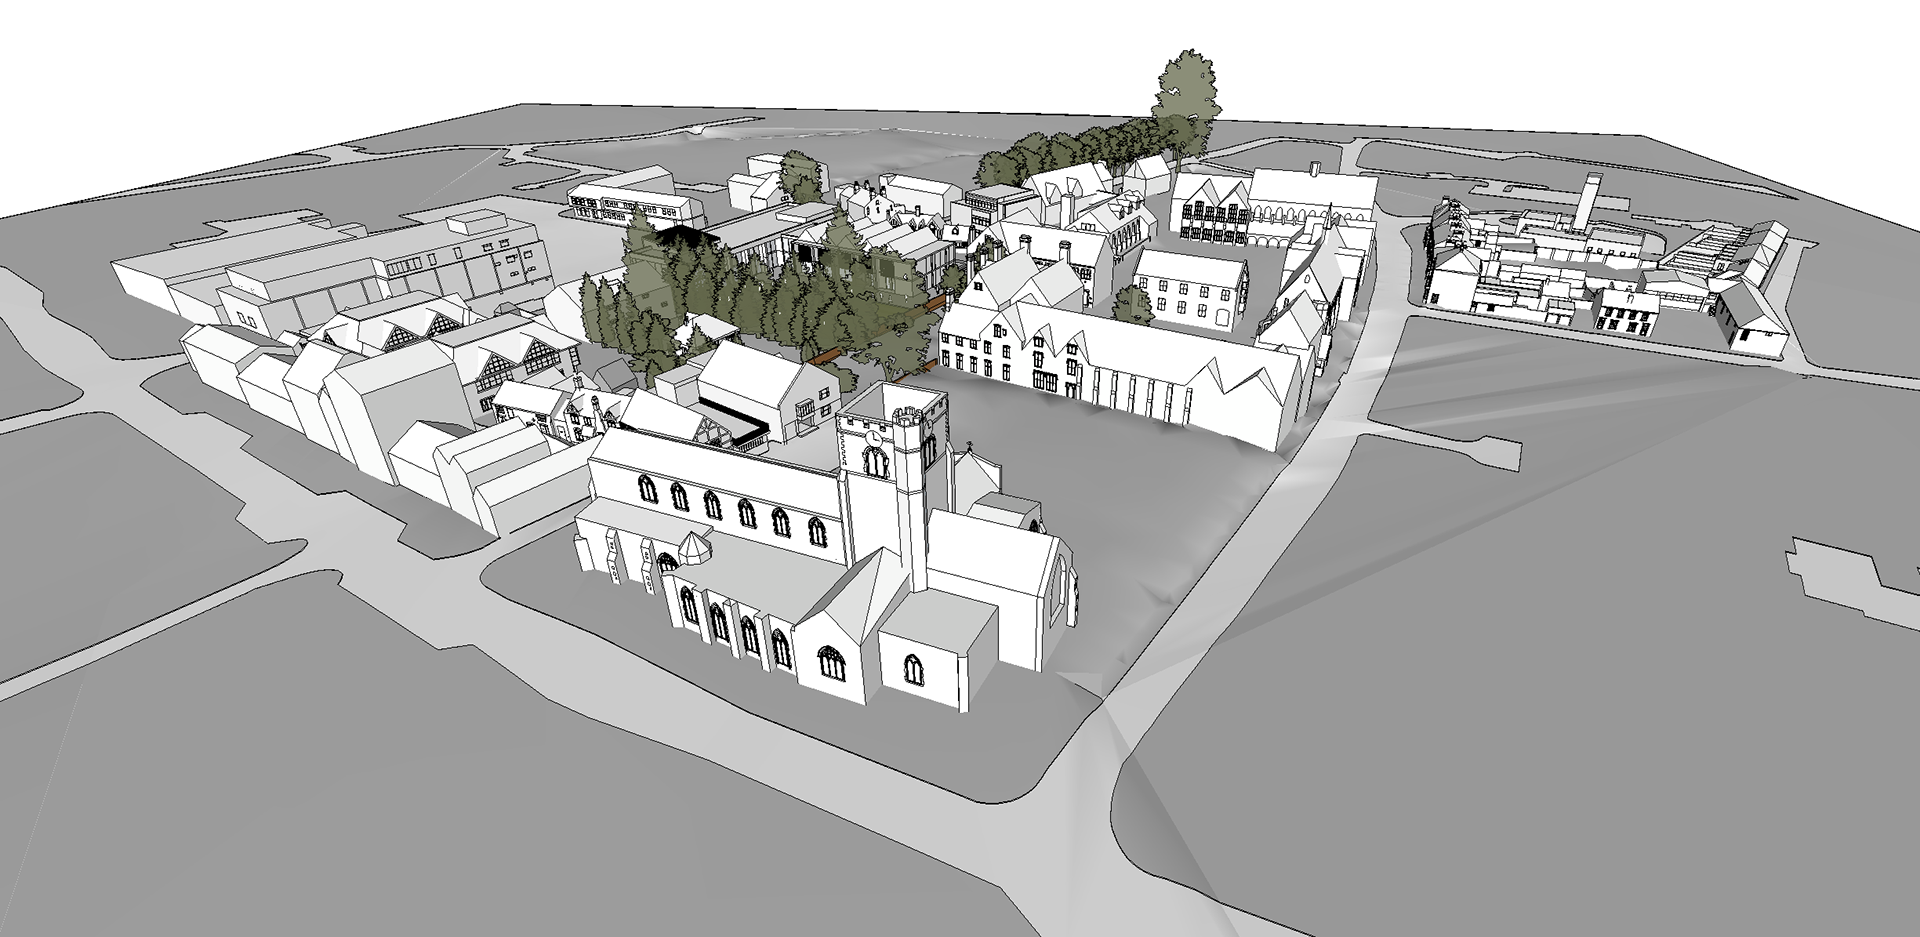
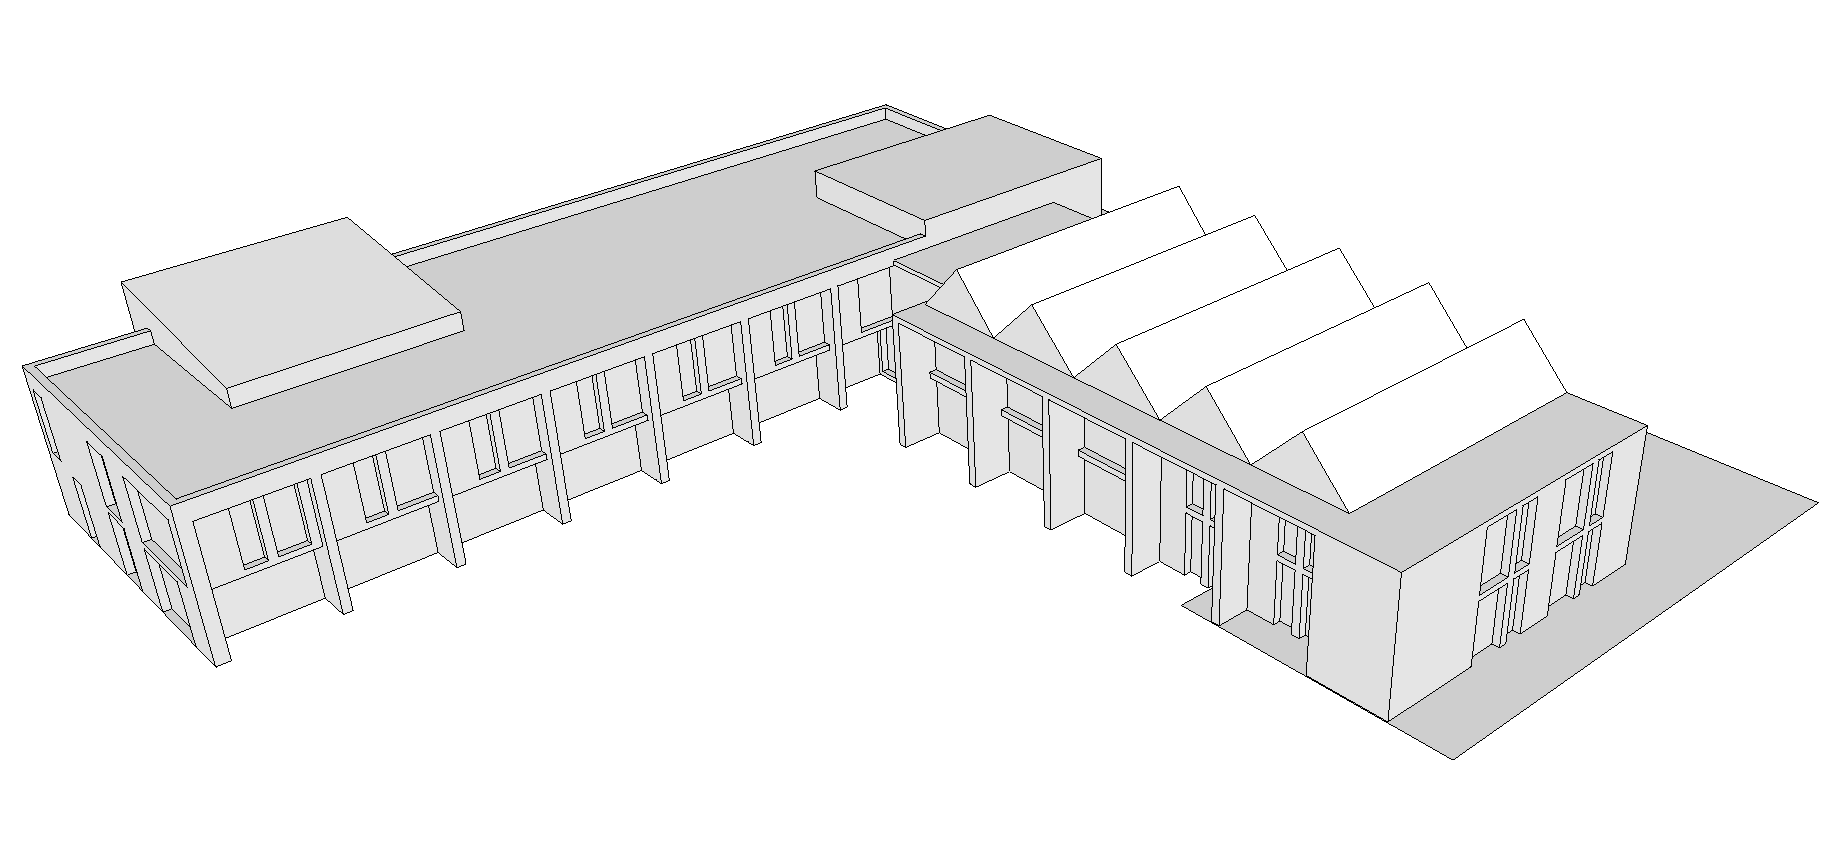
I was introduced firstly to the project, Birkhamsted, and the site all 3D modelled on Sketchup; ready to create physical models, technical drawings, and visuals from. I was super impressed with the look of the site drawn on Sketchup, and really liked how the site provided such context for the proposed designs - essential to the conversation and particular design problem the team were trying to overcome at the moment., which was whether the new proposed building would encroach upon its listed surroundings and ruin the skyline, as the three-storey Tesco had already done, [site model shown below, penultimate building in the far right hand corner]. The team were specifically looking at roof heights, as well as the impact of the proposed building upon the existing landscaping scheme, which consisted of 4, courtyard-type areas, which sat snugly central to all the surrounding buildings.
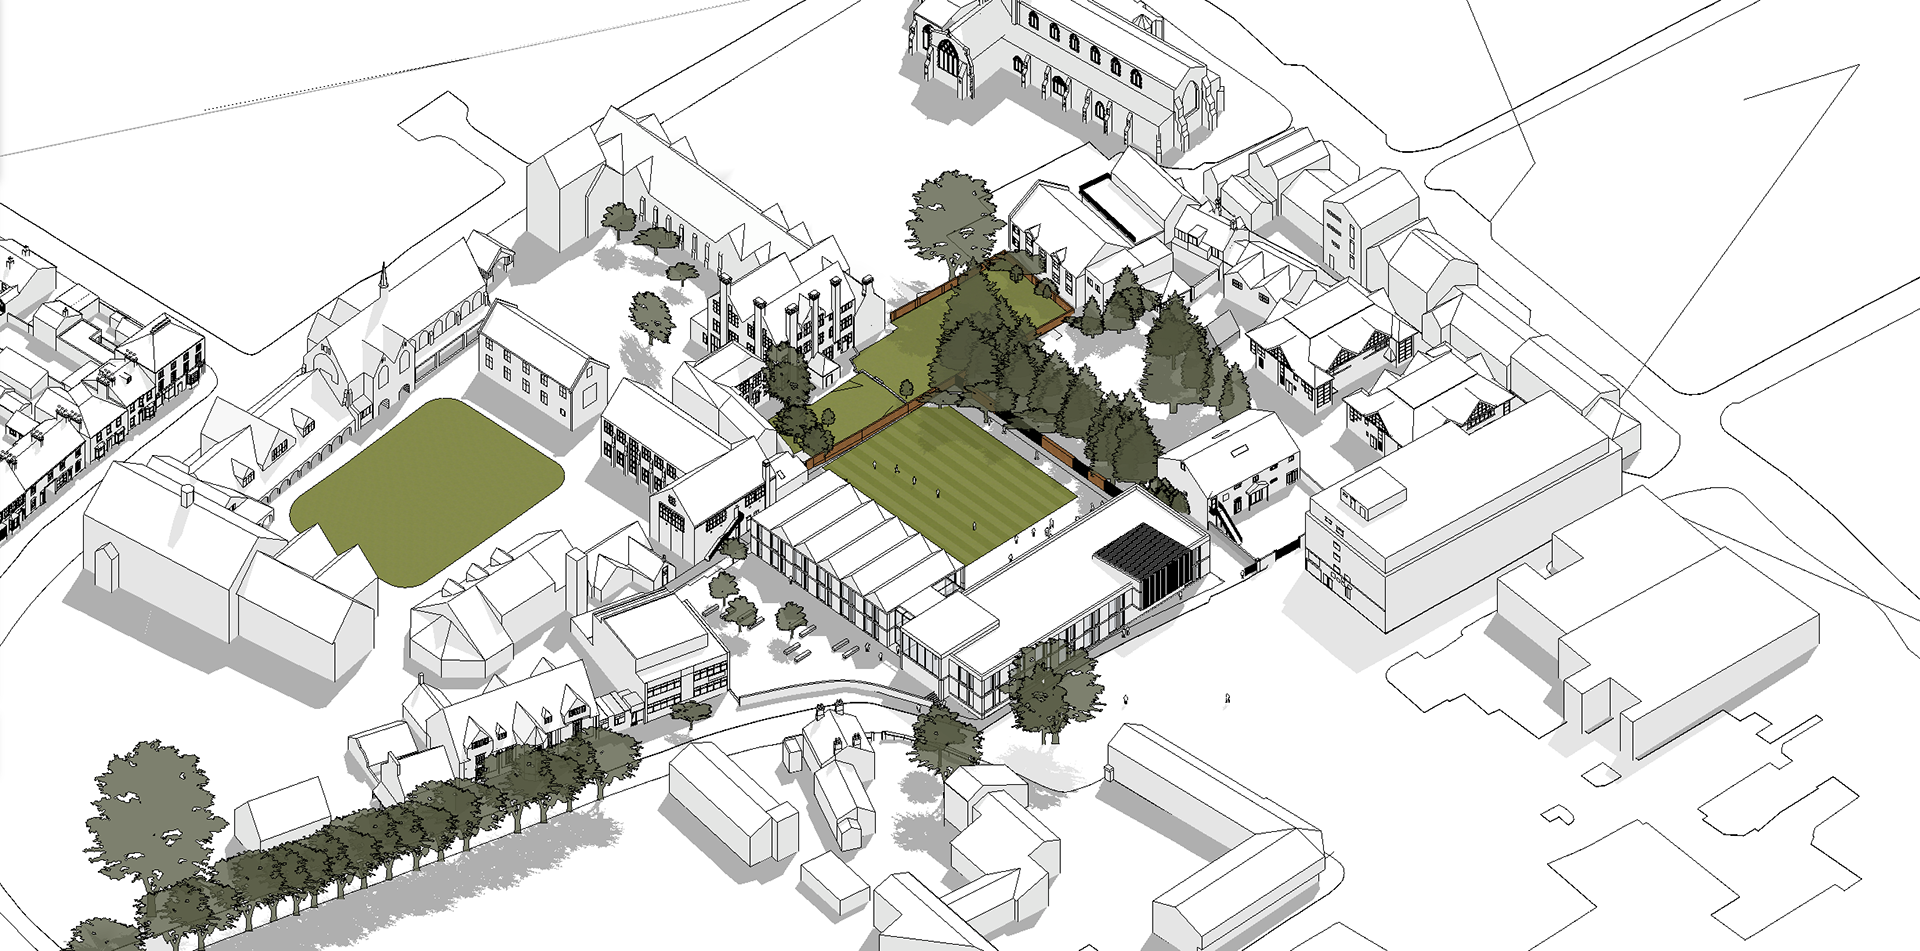
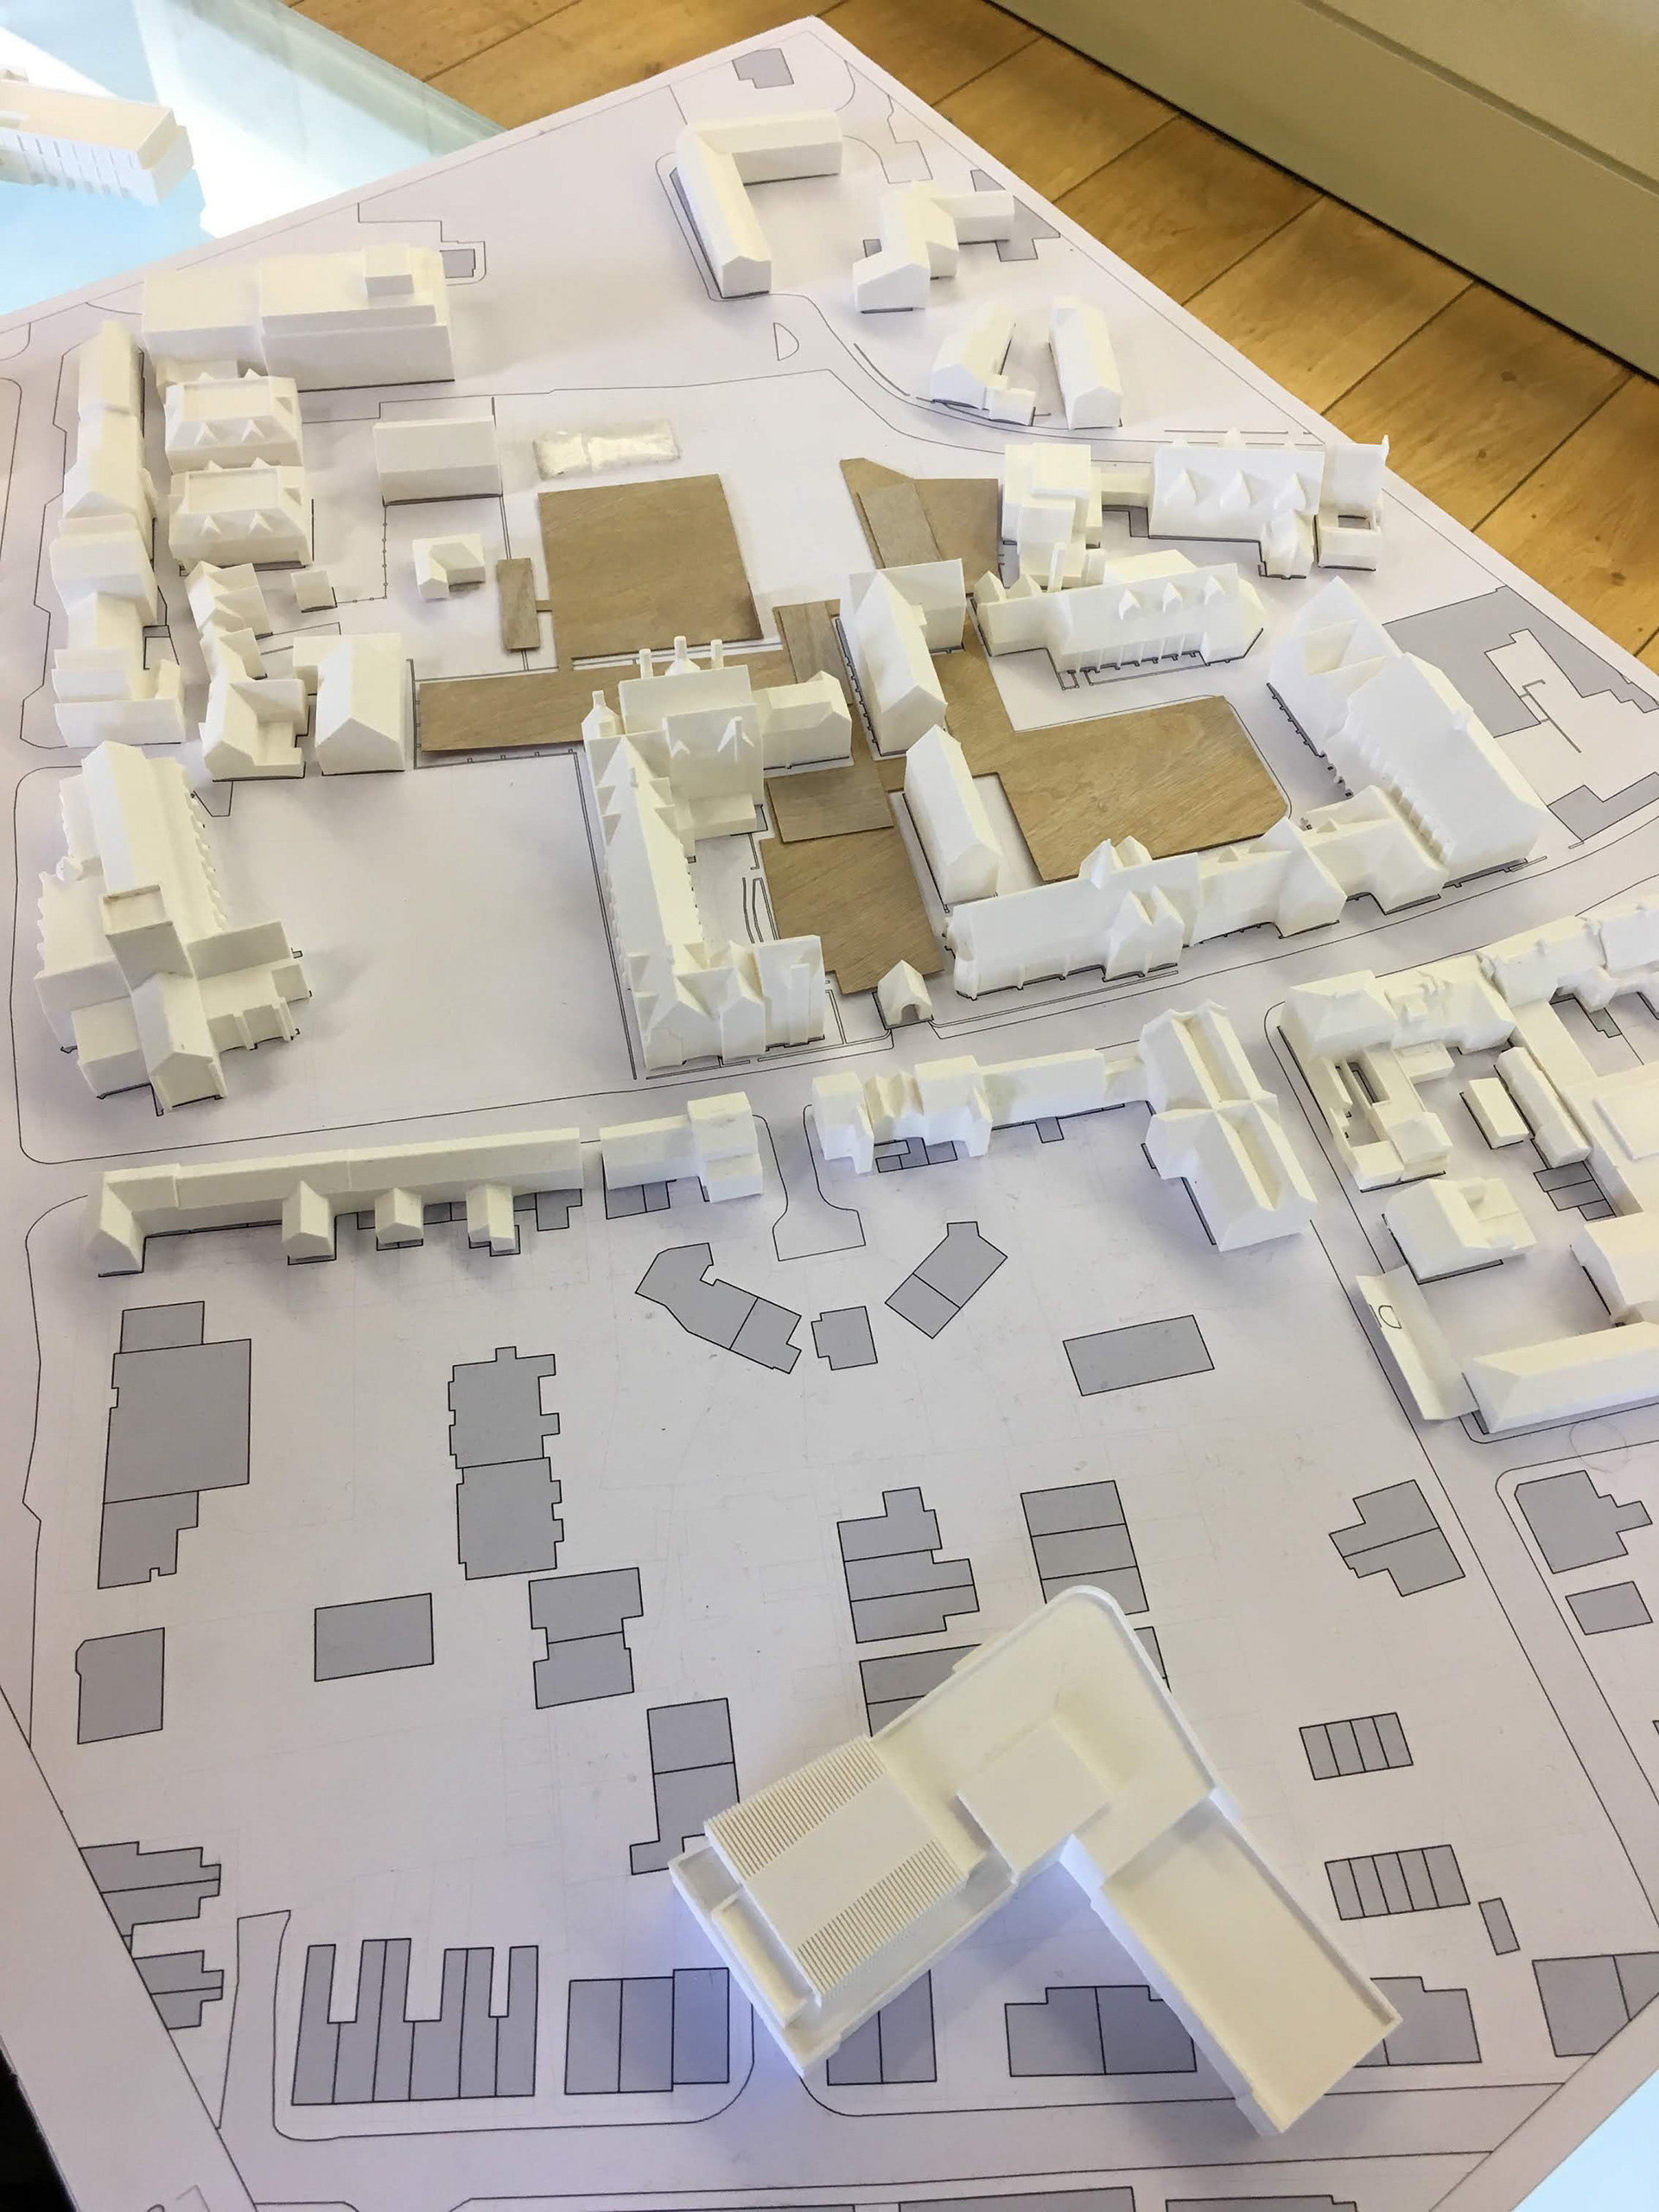
Here shows two images, one physical model, a mixture of 3D printed mass models and a cut wooden landscape scheme which would be dropped in and removed to represent the significance of the courtyard configuration. The second image shows an isometric-style view of the site modelled in Sketchup, highlighting roof heights and building storey heights.
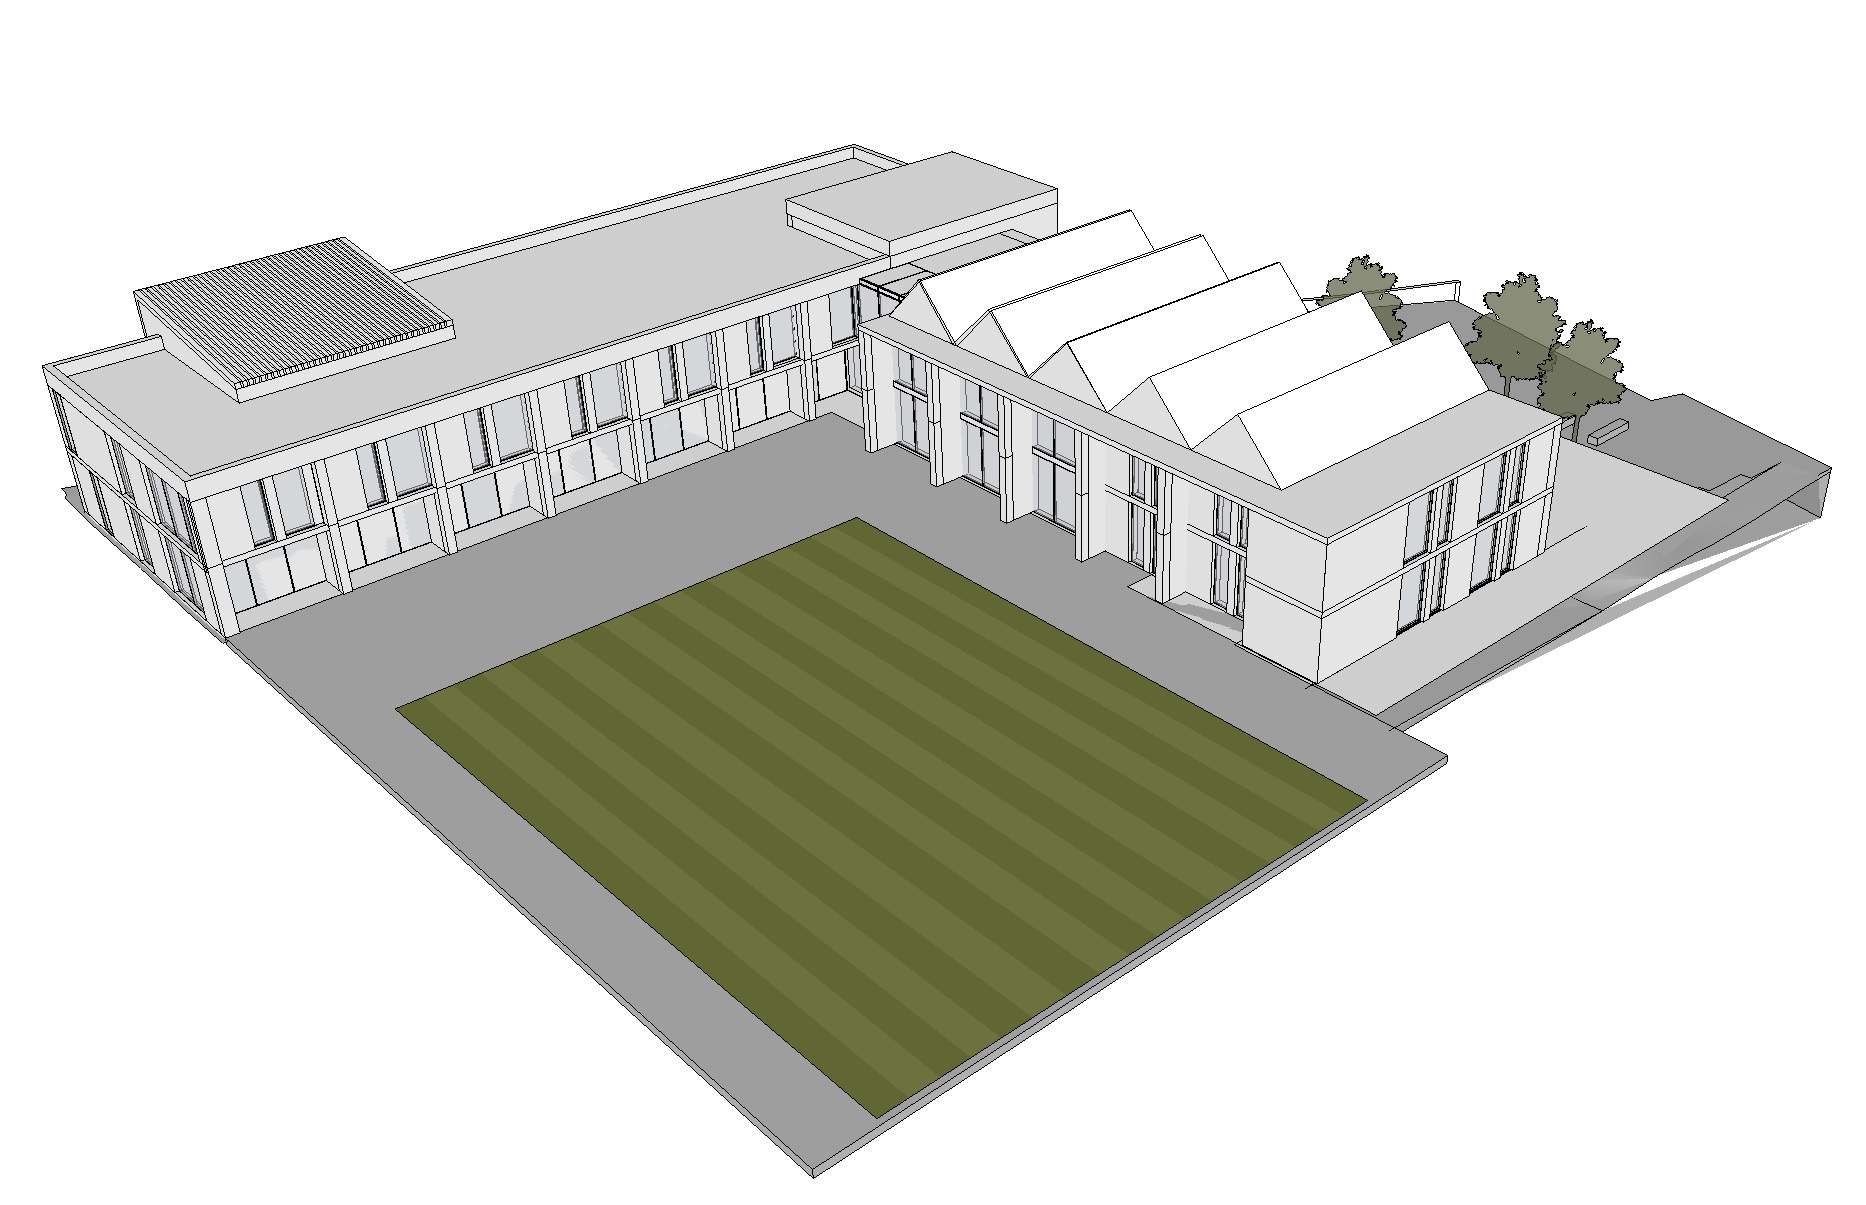
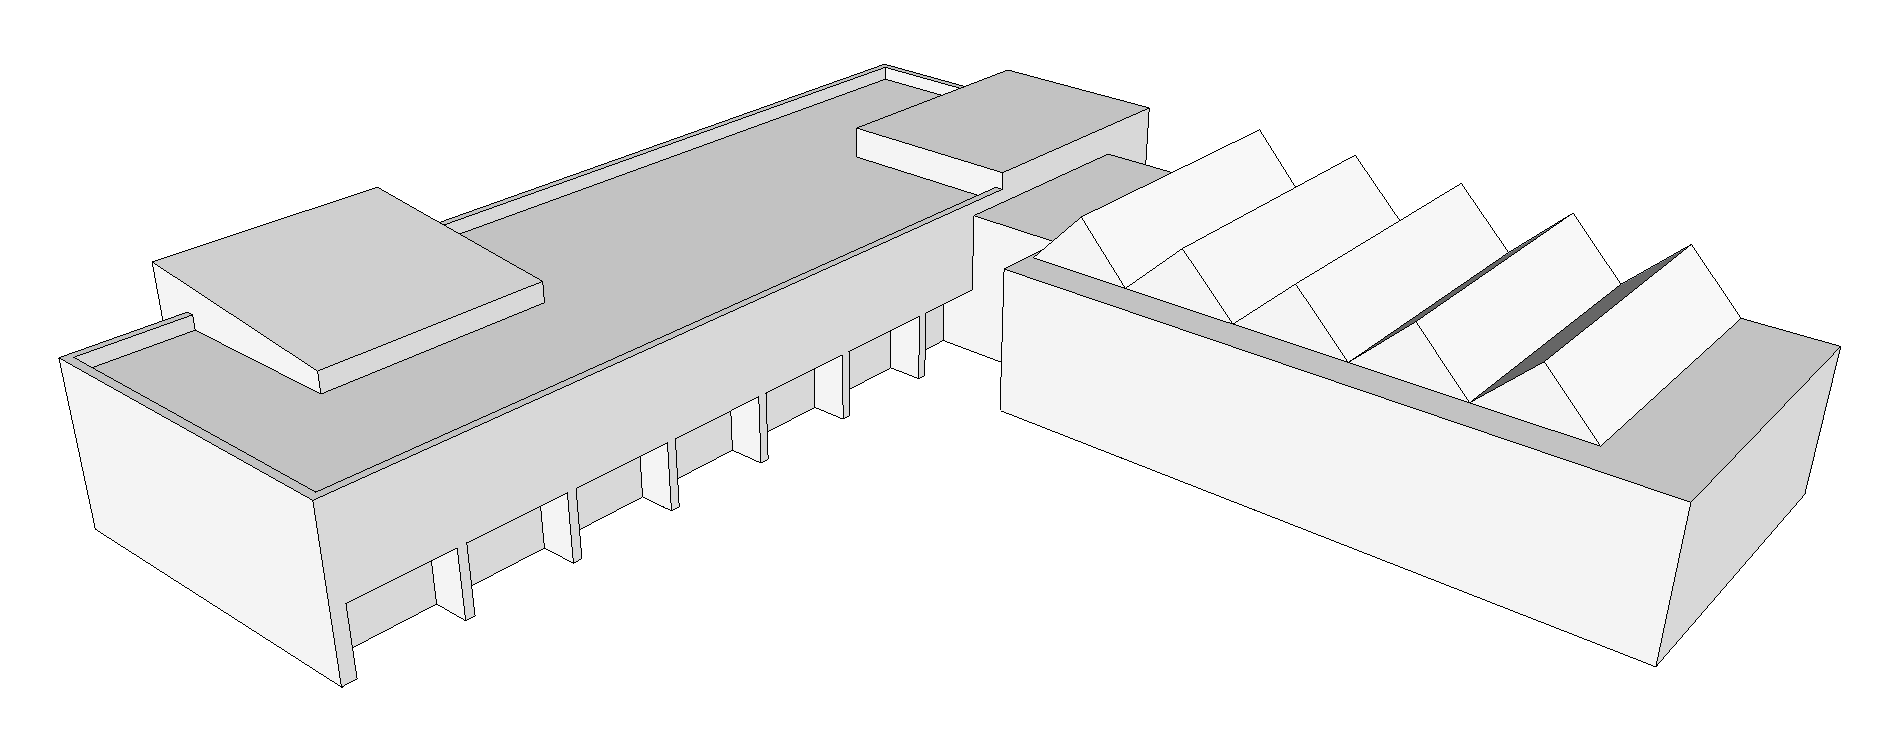
I imported the L-shaped model that was of interest, sitting central in the site, into a new Sketchup file. I created a new group within the building group, and used the keyboard short cut 'V' to bring a greyed-out version of the existing model in and out of my view, so that I could begin tracing over to create a simplistic model for 3D printing. Having spent 3 days trying hard to persist with the method I had been using, I had struggled a lot with faces deleting and had obsessed over trying to rebuild the model without gaps and overlapping faces. I decided to start again! Now knowing what I was doing, I knew I would be able to make a cleaner, better model if I did just start again, and anyway, Marco told me, the design had in fact changed!
After sitting in on a meeting in the morning looking at roof options, building demolitions and focusing on the landscaping scheme, I had a better and more detailed understanding of the project. I set to work, creating the simple block structure - what I had essentially achieved in 3 days - in half an hour before lunch! Pleased with myself, I told Marco and set about creating the windows and wall recesses.
I was just drawing the last two rectangles on the north elevation, super happy with my work, when Marco came over to my desk;
"Bad news Tash... the boss says no windows".
I guessed this is the life of an architect! Laughing, I said no worries, and I set about using the 'Push-Pull' tool to pull the geometry back to its even plane. I could see why he didn't want them, since we had discussed so heavily in the morning meeting how the model was to be representative of the roofs, and was focussed on illustrating to the client the building heights, not their facade design... Still, I could have had the model finished by lunch time if only he'd said earlier!
The original, existing proposed model I used to '3D trace' over
My model for 3D printing, including the windows
I saved my model with its windows anyway, proud of its clean structure down to the simple geometry I had been sure to use. I think I will print this model myself to keep! Just for my own self-preservation!
My block model ready for 3D printing, without the windows
With the model ready to print, I watched as Elizabeth, a part 1 who was working with Marco and had sat in on the meeting that morning, prepared the file. She exported it as an STL in Sketchup, and imported it onto the 'Cura' software that was a plug-in for the printer. She changed all sorts of settings for printing, such as wall thickness and supports, which made the print time reduce from about 13 hours to 6! A very long time, I thought. Still I had to give it to the printer, it would look very cool when it was eventually finished! We set it overnight, and when I came in on Friday morning this is what I saw!


Once the models had finished printing shortly after I arrived, Elizabeth and I set about peeling them off the print bed, and cleaning the printer with some windowlene before the next print- my model! Elizabeth took me to the model station, that my desk has sat in front of for the last 7 weeks, and I finally got to utilise it! It's such an exciting space, with materials, tiny trees and timbre veneers scattered all over it, and all around its edge sit beautiful, hand-crafted models by the DEA team. I've watched many beautiful models appear over my last 7 weeks here, noticing that my favourite ones are the combination of clean, white models, either 3D printed or created using mount or foam board, and laser-cut timbre bases. One that has been sitting on my desk for the past week shows a fantastic design proposal, clearly shown through the contrasting use of timbre, compared to the surrounding existing site which has been 3D printed using white filament. The central design is embedded in a sea of trees, made from wire stems and brown paper, and contoured ground levels which creates a great effect.

Elizabeth showed me how to clean up the 3D print, since the printer had printed it with lots of 'supports' for the overhangs on the model. There were some parts of the model that I was able to just pull off as they were called 'breakaways', but the rest I used the scalpel to cut away the unwanted parts.


The neat, clean models after I had finished cutting away the unwanted filament.
Marco helped me to pull away the breakaway material on one of the models, shown below, however this design included columns and whilst he was pulling off the breakaway the columns were too fragile not to break off too. So he said I could instead use little timbre stems representatively instead, and I cut 14 mm lengths from cut off's of wooden dowelling. It actually made for a very effective canopy!


So the models were finally ready to use, and we set about placing each different option within the site. We showed it to Rod, and lead architect on the Birkhamsted project, Olly, and they commented on the widths and height of the building proposed. Although a lot of the comments were negative it was okay, since the physical model had really done its job of helping us to see what we were questioning and putting forward to the client! There was A LOT of fuss over the landscaping strategy, and Elizabeth and I spent the rest of the day working on it, looking at how the proposed demolitions would affect the courtyards, and how we could show this in a positive way to the client, since we were fighting for the demolitions. Rod advised us to break up each courtyard, being sure to represent the spaces and connections between buildings, suggesting we make some trees to show this space. I created geometry representative of trees, since he said he didn't want distractions and wanted 'inconspicuous trees'. Using a pin and a wooden ball, I sat for a very long time trying to make them stick!


They worked eventually!
